Needlework Framing Photos
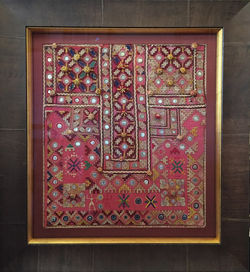
Sometimes a frame can take days to complete, even if the design appears to be a simple one. This beautiful antique beaded needlework was brought in with absolutely no border for stretching. First, it needed to be hand stitched to a piece of cotton. Then, several templates were made on the computerized mat cutter to achieve the perfect shape to surround the corners. The template was used as a guide to stretch the needlework so that it was perfectly straight and aligned, showing every single bead. A 100% cotton matboard was cut to be used as a spacer between the stretched needlework and the top mat. Finally, the bevel of the top mat, a rich, leafy green silk-covered mat, was hand painted in gold. The bevel was painted three times for complete coverage, and painted free-hand (unmasked) to make sure the fibres of the silk remain uncoloured.


 |  |  |
|---|---|---|
 |  |  |
 |  |  |
 |  |  |
 |  |  |
 |  |  |
 |  |  |
 |  |  |
 |  |  |
 |  |  |
 |  |  |
 |  |  |
 |  |  |
 |  |  |